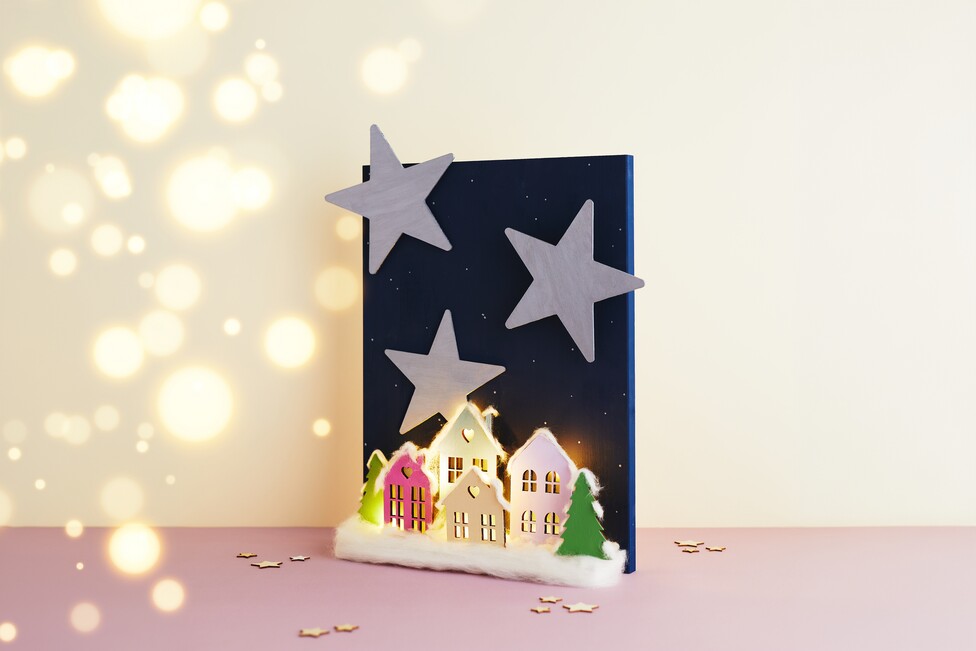
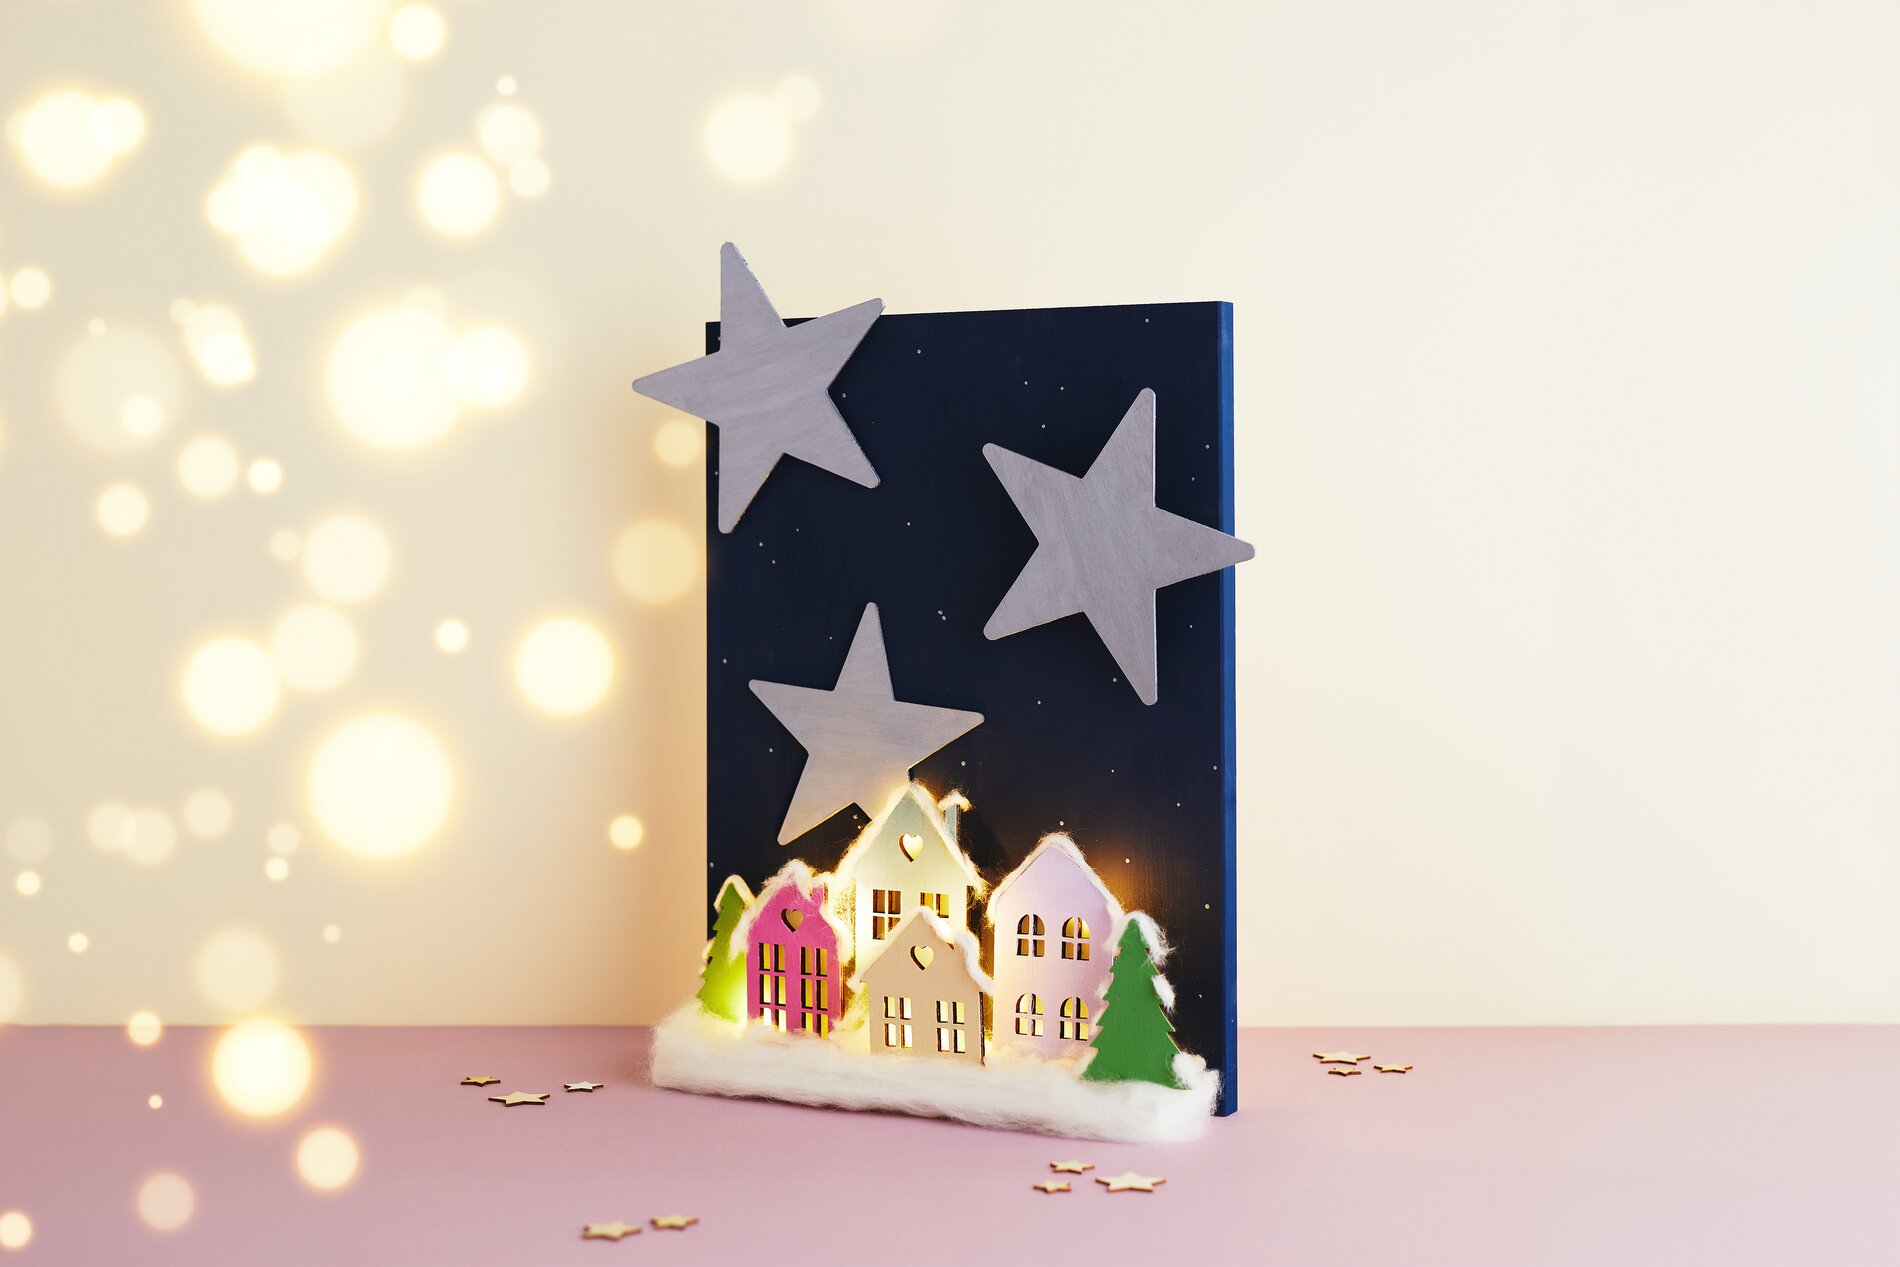
Create a Winter-Themed Wooden Picture with a Glowing Village
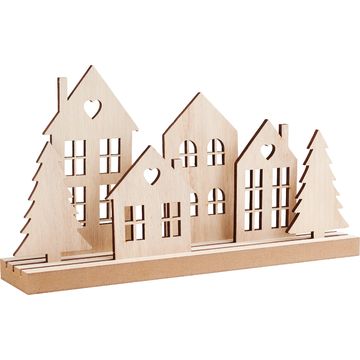
First, gather the craft supplies you’ll need: a wooden board, the building kit with houses and fir trees, craft paints, vellum paper, handicraft glue, hot glue, a chain of light, fairy-tale yarn, silver acrylic-metallic paint, a bamboo skewer, picture eyelets, and a ribbon. Plan the layout briefly: The silhouette of the houses sits at the bottom, and a beautiful “night sky” is created above it.
Step 1: Paint the wooden board and building kit – the base for the winter look
First, paint the wooden board with handicraft paint. A dark, wintry background color ensures that the houses and lights will shine more brightly later on and really bring out the house silhouette trend. Next, paint the “ building kit: ” Houses in light, wintry shades look like snow-covered facades, while fir trees in rich green add a sense of tranquility and depth to the village. Let the paint dry thoroughly so nothing smudges as you continue working.
Step 2: Backing the Windows – Creating the “lanterns ” Effect
Cut the “ vellum paper ” to size so that it covers the window areas of the houses from behind. Glue the “ vellum paper ” behind the houses using “ handicraft glue .” The “ Paper ” will later diffuse the light, making the windows glow softly and evenly. Make sure the glue doesn’t run into the window openings so the edges stay clean.
Step 3: Install the chain of light —Warm Glow in the Christmas Village
Position the bulbs from the “ chain of light ” behind the houses, where the windows are. Secure the bulbs with hot glue. Hot glue sets quickly and holds securely, which is important for the “ chain of light ” so that nothing shifts later. Check periodically to make sure all the lights are positioned so that the windows are evenly illuminated.
Step 4: Assemble the Village – Use the Plug-in Track Correctly
Place the houses and fir trees into the plug-in track. This will give you a stable, neat row and allow you to arrange the spacing harmoniously. Take a moment to check the composition: Different house widths and the fir trees add variety, making the silhouette come alive.
Step 5: Snow Made from Fairy-Tale Wool—Soft Edges, Wintery Atmosphere
Glue white fairy-tale wool onto the building kit, to represent snow, especially along the bottom edge and in spots along the roof edges. Fairy-tale wool looks like freshly fallen snow and instantly makes the scene cozy. Work in small sections: This way, you can shape the “snow border” precisely without it becoming too compact.
Step 6: Prepare the stars and paint them silver—add “ metallic-” accents
Apply a little “ handicraft glue ” to the holes in the stars and let it dry. This step stabilizes the edges and ensures that the holes remain clean later on. Then paint the stars with silver “ acrylic ”-metallic paint. metallic paint reflects the light and fits perfectly with a winter design because it shimmers like fine hoarfrost.
Step 7: Attach the hanging mechanism—so your wooden picture hangs securely
Screw picture hooks onto the back of the wooden panel. This will allow you to DIY-hang your wooden picture securely later. Space the holes as evenly as possible so the picture hangs straight. Then attach the ribbon to the hanging mechanism once everything is completely dry.
Step 8: Secure the design and decorations—now everything becomes permanent
Glue the building kit to the wooden panel using hot glue. Hot glue is ideal here because it bonds the components immediately and makes the scene stable.
Glue small wooden discs, to the back of the stars, apply glue to them, and then place the stars on the board. The wooden discs create space between the stars and make them look more three-dimensional, almost as if they’re floating.
Step 9: Dotting Snowflakes – Fine Details for the “Night Sky”
Take a bamboo skewer and the silver acrylic-metallic paint and use them to dab small dots onto the board. These dots look like delicate snowflakes or twinkling stars and complete the Winter Whisper look. Vary the dot size slightly by using just the tip of the brush at times and a little more paint at others.
Finishing and Decorating
Let all the glued areas cure completely, then display or hang your glowing Christmas village.
The wooden picture looks especially festive as a “ window decoration, ” on a sideboard or in the hallway, where the “ chain of light ” creates a warm welcome. If you’re in the mood for variations, you can paint the houses in pastel shades, classic white, or with individual pops of color—the silhouette of the houses will always remain the focal point.
Now it’s your turn! If you’re looking for more ideas for wooden “ christmas decoration ,” “ chains of lights-” projects, or matching winter-themed colors, browse our online shop and put together your next craft project exactly to your taste.